26 Sept 2014

The BBE: Best Baklava Ever

From this day onwards, there will have been my life before, and my life after this baklava. 
There is no forgetting or turning back. 
Every time I look at the pictures, I stare at them in wonder and remember how amazing it tasted and how I ate 7 portions of it, without shame. 
I just couldn't stop. But, sweet lord, every single million calorie bite was worth it.
Welcome to a new world.

The Best Baklava Ever

If you can pull together a lasagna dish, you can make baklava in your sleep. It is extremely easy to make!

It takes a little time though, just because you need to butter every single layer of filo (I did it with great care, it took me a while but it was a very therapeutic experience).
The result is phenomenal. I still can't believe it, but these were the best baklava I've ever had.

French glacé cherries are optional, but I find they work really well with the pistachios.

Ingredients:

For the syrup:
1 cup caster sugar
1 cup honey
1 stick cinnamon
1 or 2 green cardamon seed
1 star anise
2 cloves
1 tbsp lemon juice, freshly squeezed
1 tbsp rosewater

Filling and filo pastry:
1 pack of filo pastry (I bought "baklava" filo from my local Mediterranean supermarket, which is a nice and thin filo, best for baklava)
450g nuts, 50% unsalted pistachios and 50% blanched almonds (without skin)
10 French Glacé Cherries (optional), finely chopped
Approx 200g butter, melted
1 tsp ground cinnamon
1/4 tsp salt

Equipment:
Little pans and bowls
wooden spoon
sharp knife
square or rectangular oven proof/gratin dish (approx 10x15 inch/ 20x25 cm)
pastry brush (looks like a kitchen paintbrush)
food processor (or pestle and mortal)

Method:

First, make the syrup:
1/ In a heavy bottom small pan, combine all the syrup ingredients except for the rosewater and cook over medium heat, stirring with a wooden spoon until sugar has dissolved and the syrup starts to boil. Reduce the heat and simmer for around 10 min until the syrup is slightly thickened. Remove the whole spices, lemon zest. Add the rosewater, mix and leave to cool in a measuring jug or little bowl.

Then make the baklava filling:
2/ Preheat the oven to 180deg C (350 F)

3/ Place the almonds and pistachios in a food processor and pulse until finely chopped (don't worry if you still have some medium crumbs in there)

4/ In a medium-sized bowl, combine chopped nuts, salt, ground cinnamon

5/ In a small pan, melt the butter on low heat. Once melted, turn the heat off.

Now it's time to assemble the baklava:

6/ With the pastry brush, butter the oven dish with melted butter. 
With a sharp knife, cut 6 sheets of filo pastry (to start with) to the size of the dish (or a tiny bit smaller). The filo tends to dry and break in the open air, so set aside the rest of the pastry wrapped in cling film under a towel, until you need more.

7/ Place the first filo sheet at the base of the dish and lightly brush it with butter. Don't worry if the filo breaks or has a few little holes, there will be hidden in all the layers!
Place another sheet of pastry on top and brush it with butter.
Do the same with 3 other pastry sheets.

8/ Spread approx a third of the nut mix on top of the pastry layers.

9/ Cover with 3 or 4 layers of buttered filo pastry (like you've just done before, buttering each sheet before covering it with another buttered sheet of pastry), taking out of the wrapping and cutting filo sheets from as you go along, 3 or 4 sheets at a time.

10/ Spread another third of the nut mix on top of the pastry, and spread the French Glacé Cherries on top

11/ Cover with 3 or 4 more layers of buttered filo pastry.

12/ Repeat the whole process once more until you've used all the nuts. Finally cover with 6 buttered filo pastry sheets.

13/ Using a sharp knife, make 4 cuts lengthwise through the layers of filo, aiming for something like a diamond or square shape pattern. Bake in the oven for approx 40 min or until the top layer is golden brown. Take out of the oven and leave to cool for 5min.

14/ Slowly drizzle the syrup over the baklava, which will still be warm. There seems to be a lot of syrup, but don't worry, the baklava will slowly suck it up.

15/ Let the baklava stand for a few hours, before running a sharp knife again through the cuts and serving.


Drizzling the syrup over the bakes baklava


5 Sept 2014

Wild blackberry and almond tart

Picking wild fruits has always been one of my favourite activities.

When I was a kid, my grandparents had a family house near Lyon (France), next to which there was a cherry orchard. Every year, during the cherry season, we'd drive the 350km separating us from the house to spend a long weekend there with the whole family (uncles, aunts, cousins and all). My grandpa and grandma would have arrived a few days early to get the house ready and repair their two best ladders. By the time we'd get there, grandpa would have set his ladders against the two bigger trees in the orchard, declaring the cherry picking open. 

For three days, my cousins and I would spend most of our time in the orchard, eating and picking cherries, splitting each tree between the lower branches, to be taken care of by the little kids, and the higher by the taller kids (I was a very little kid, so I mostly stood below the ladder and waited for my older cousins to drop cherries onto my palm). We'd proudly bring back a hamper full of the big dark red cherries to my grandma, who would turn them into the most delicious cherry clafoutis, that we'd eat at every meal for 3 days. 

These days belong to the happiest memories of my childhood.

Today, there is no cherry orchard next to my parents house, but my dad has kept up the family tradition and every time I go visit them during the blackberry season, I join my dad, my little nieces and nephews for a wild blackberry picking session and I'm pretty sure that, like me, these moments will also be engraved in their memories for a long time. 

wild blackberry tart


Wild blackberry and almond tart

We picked these blackberries about 10 days ago in the six miles of bushes that along the cycle path going from Canterbury to Whitstable.
Blackberries and almond work wonders together, but a classic almond frangipane can easily over-power the blackberries.
I made an almond base without butter spread it relatively thin on the pastry case, so it would not bubble up into the blackberries, taste quite subtle, soak up just enough the juices of the blackberries to ensure the pastry would remain crisp.
I find the result perfect, and this tart is a real celebration of our local wild blackberries.

Ingredients 

For the sweet pastry: 
250 g flour
100g butter, cubed and slightly softened
100g confectioners'/icing sugar, sifted
pinch of salt
2 medium eggs, at room temperature 

For the almond base:
2 eggs
40g demerara sugar
100g ground almonds 

For the blackberry topping:
Approx 500g of blackberries
4tbsp demerara sugar
Sliced almonds, for decoration 

Instructions 

Make the pastry:

1/ Put the flour in a mound on a counter and make a well. Put in the butter, confectioners'/icing sugar, and salt and mix together with your finger tips.

2/ Gradually draw in the flour into the centre and mix with your finger tips until the dough becomes slightly grainy.

3/ Again, make a well and add the eggs. Work them into the flour mixture, using your fingertips, until the dough begins to hold together.

4/ When the dough is well amalgamated, knead it a few times with the palm of your hand until smooth. Roll the dough into a ball, wrap in plastic wrap, and rest in the refrigerator for 1 to 2 hours before using.

5/ 15min before the end of the pastry's resting period, preheat the oven at 170deg C and prepare the almond base: in a bowl, whisk the eggs with a fork. Add the sugar and ground almonds, and whisk until well combined. 

6/ When the dough is rested and you are ready to use it, unwrap and roll out on a lightly floured counter to a 2 - 3 mm thickness (depending in how thick you like it. This pastry is quite solid, so you can roll it out thin if you like). 

7/ Line a tart dish with the pastry, cut out the pieces hanging over, cover the pastry with baking parchment and dried beans or baking beans, and bake blind for 10mins. Remove the baking beans and parchment, and bake for further 5mins until lightly golden. Take out of the oven and leave to cool for 10-15min.

8/ Spread the almond base evenly on the pastry case.

9/ In a bowl mix the blackberries with the demerara sugar, and spread evenly on top of the almond base. Sprinkle with sliced almonds, and bake for 25-35 min. (Take care that the pastry case doesn't burn)

wild blackberry recipe
wild blackberry tart recipe

Pastry recipe adapted from Michel Roux's pâte sucrée by The Messy Baker

29 Aug 2014

Scottish Lavender Shortbread

I've been having haggis cravings lately.
No, it's not a sign that I'm pregnant with a Scottish baby.
(For that matter, The Man is not Scottish anyway)
So it might be a sign that I'm ready to celebrate a very early Burns Night or just wanting haggis season to start now.

Of course, there's no such thing as a "haggis season", but The Man has decided that it's too hot to eat haggis these days.
Nonsense. I'd like to take him to Savoie (in the French Alps) and we'll see if those Savoyards (people from Savoie) stop eating tartiflette and raclette (local delicacies based on melted cheese, potatoes, charcuterie and all things fat) in summer!
 Whatever (yes, I am a rebellious teenager)And I'm enjoying the anticipation almost just as much (Mainly I'm secretly hoping for a cold wave next weekend to justify a we're-having-haggis-for-dinner revolution).
Until then, I've managed to bring a little taste of Scotland to our tea breaks.
recipe scottish shortbread

Lavender Scottish Shortbread

I fell in love with shortbread when I visited Scotland last year and tasted real artisan shortbread, which is very different from industrial shortbread.
You could flavour this shortbread with many different things (orange zest, dried cranberries, chocolate chunks, etc) but I love the delicate aromas the lavender brings to it, for a slightly posh version of this lovely traditional Scottish biscuit.
As it's a very buttery tasting biscuit, make sure you use good-quality butter, so you get the best results.
 
Ingredients

200g plain flour (+ extra for dusting)
125g cold unsalted butter, diced
25g caster Sugar
25g lavender sugar

Method to make lavender shortbread

1/ Preheat the oven to 170°C/325°F/gas 3. 

2/ Mix the flour and sugars together in a mixing bowl. 

3/ Rub in the butter with your thumb and forefinger, squash, pat and push it into a dough. 

4/ Transfer to a baking sheet lined with baking parchment (or onto a baking silicone mat), and without kneading it, pat it down flat until it's 1cm thick. 

5/ Cut out shapes with a cookie cutter (square, round, or finger-shaped. If it splits or tears, just press it back together). Try and work the dough as little as possible to ensure it will be a short as possible and make very crumbly shortbread.
If you like, score lines on the shortbread so that you can click the biscuits off into pieces later


6/ Sprinkle over some caster sugar, and bake in the oven for 20 to 30 minutes until it's a light golden colour. Leave to cool completely before serving or storing in a tin.


Recipe adapted from Jamie Oliver

19 Aug 2014

Homemade toffee popcorn

I've got a new passion. And it has a name: Elvis Presley.

It all started with The Man playing me records on Saturday mornings while I bake. 
Since his music repertoire is much wider than mine (I am limited to what airs on Magic 105.4fm), he constantly introduces me to lots of different bands and music genres, including approachable bands and more obscure stuff.
Before long, The King became my favourite Saturday morning baking session soundtrack.
Still, the image I had of Elvis tended to be of the overweight and drugged up 1974 version of him. Until one day, The Man came home with the 68 Come Back Concert DVD, and I fell in love with the "cool as hell" Elvis. 

From his story and his songs, to his movies and interviews, I became a little obsessed with everything touching Elvis, watched every youtube video about him, and to this day am completely fascinated.

So this week's recipe is dedicated to The King!


Homemade Toffee Popcorn

When I was a child, I loved going to the movies, mainly for the toffee popcorn from a brand called Baff that my mum would traditionally buy for us when she'd take us to the cinema
Since then, I've been dreaming of re-creating a toffee popcorn as nice as this one. I'm not sure this taste exactly the same, but there definitely goes down like a treat!

Ingredients (for 2 people)

50g popping corn
20g muscovado sugar
6 tbsp golden syrup
40butter

Prepare the toffee popcorn

1/ Warm the oven at 180deg C.

2/ In a medium pan with a lid, heat -on high heat- the corn without any oil or butter, shaking the pan regularly so the corn doesn't burn, until it starts popping. Reduce the heat and keep on shaking the pan regularly until you can't hear any popping sound anymore. Transfer the popped corn into a bowl.

3/ In a small pan, melt the butter, golden syrup, and cook on medium heat, mixing regularly, for about 3 to 4 minutes, until it thickens slightly.

4/ Slowly pour the toffee sauce on the popcorn, mixing continuously with a spatula (ideally silicone so the toffee sauce doesn't stick to it) until the popcorn ispretty much fully coated in toffee sauce. 

5/ Transfer the toffee popcorn onto a oven tray lined with baking parchment and cook in the oven for 5 to 10 minutes (we're not really cooking the popcorn but more setting the toffee coating on it)

6/ Transfer to a serving bowl and enjoy with a good DVD!


  And for a glimpse of Smoking Hot Elvis


Who's the little bear on the photos? It's Chocolat my travelling bear, of course! To follow his travels and adventures, check out Chocolat's facebook page.

12 Aug 2014

Cornwall #2: a rambler's paradise

Cornwall is not only an enchanting foodie region, it's also a great place to do walks.
So if you wish to follow the South West Coast Path or do other short walks, there are plenty of choices wherever you are in Cornwall and whatever your level is.

If you're a wildlife lover, there are so many bird species to look out for, such as the famous Cornish choughs. And you might even get a glimpse of sea lions too.

As you walk, you'll regularly find tea rooms or pubs to stop at for a drink. You'll also have a chance to pick up fresh produce from "honesty box" displays. 

I had never encountered "honesty boxes" before visiting Cornwall and I really loved the whole idea behind them. Locals display, unattended at the entrance of their properties, trays of produce that they grow in their gardens (vegetables, fruits), make themselves (jams, etc), or farm (eggs, etc). Items are often priced, but not always. Next to the trays there is an unlocked money box or jam jar called the "honesty box", where ramblers pay in cash for whatever they take away with them, offering the price they think is fair for those un-priced items. 
Of course, in the paradise that is Cornwall, no one seems to cheat or steal. It made me feel like I was walking in some kind of a magic world, so far from our busy capital city. I loved it!

Last but not least, as you walk you'll get to see incredible views, a sea as blue as you can imagine, beautiful light houses, quirky old mining chimneys, plenty of thatched cottages and lovely villages.


Jamaica Inn, the real one!


St Michael's Mount

Mousehole


St Ives


1 Aug 2014

Hugh Fearnley Witthingstall's Beetroot and Chocolate Brownies

Why on earth would you add beetroots to your brownies?
Well, for many good reasons really: 

- If you're on a diet, you should know that they bulk your brownies up without adding anything bad for you, which makes each portion a little less rich. (oui, oui!)

- If you love trying new things without compromising on taste, you should give a shot to this not-so-usual pairing, which doesn't make your brownies taste strange in any way.

- If your main goal is to bake cakes as moist as possible, then beets (like carrots and courgettes) should be your friends.

- If you just want to experience the joy of seeing the faces of your friends, family members and colleagues loving your brownies, and being so surprised when you tell them that there are beetroots in them: go for it, it's worth it!


Hugh Fearnley Witthingstall's 
Beetroot and chocolate brownies
Ingredients
250g unsalted butter, cut into cubes
250g good quality dark chocolate, broken into pieces
3 medium eggs
250g caster sugar
A pinch of salt
150g self-raising flour (wholemeal ideally but white works well too)
250g beetroot, boiled until tender, cooled, peeled and grated (I used sous-vide Sainsbury's beetroots, and drained the water)
100g chocolate, of any colour, for the decoration

How to make the beetroot and chocolate brownies 

1/ Grease a shallow baking tin, approximately 20 x 25cm, and line the base with baking parchment

2/ Put the butter and chocolate in a heatproof bowl. Set the oven at 180°C/Gas Mark 4 and put the bowl in it for a few minutes until the chocolate and butter start to melt. Stir, then put back in to the oven for a few more minutes to melt completely. Of course, you could melt them together in the traditional way, over a pan of hot water, but you might as well make the most of the warming oven

3/ Whisk the eggs and sugar together in a large bowl until combined then beat in the melted chocolate and butter until smooth. Combine the salt with the flour, sift them over the chocolate mixture, then gently fold in with a large metal spoon. Fold in the grated beetroot – be careful not to over-mix or it will make the brownies tough

4/ Pour the mixture into the prepared tin and smooth the top with a spatula. Bake for 20 – 25 minutes; when the brownies are done, a knife or skewer inserted in the centre should come out with a few moist crumbs clinging to it. Don’t be tempted to overcook them or they will be dry

5/ Remove the tin from the oven and leave on a wire rack to cool before cutting in to squares.

Recipe adapted from River Cottage

21 Jul 2014

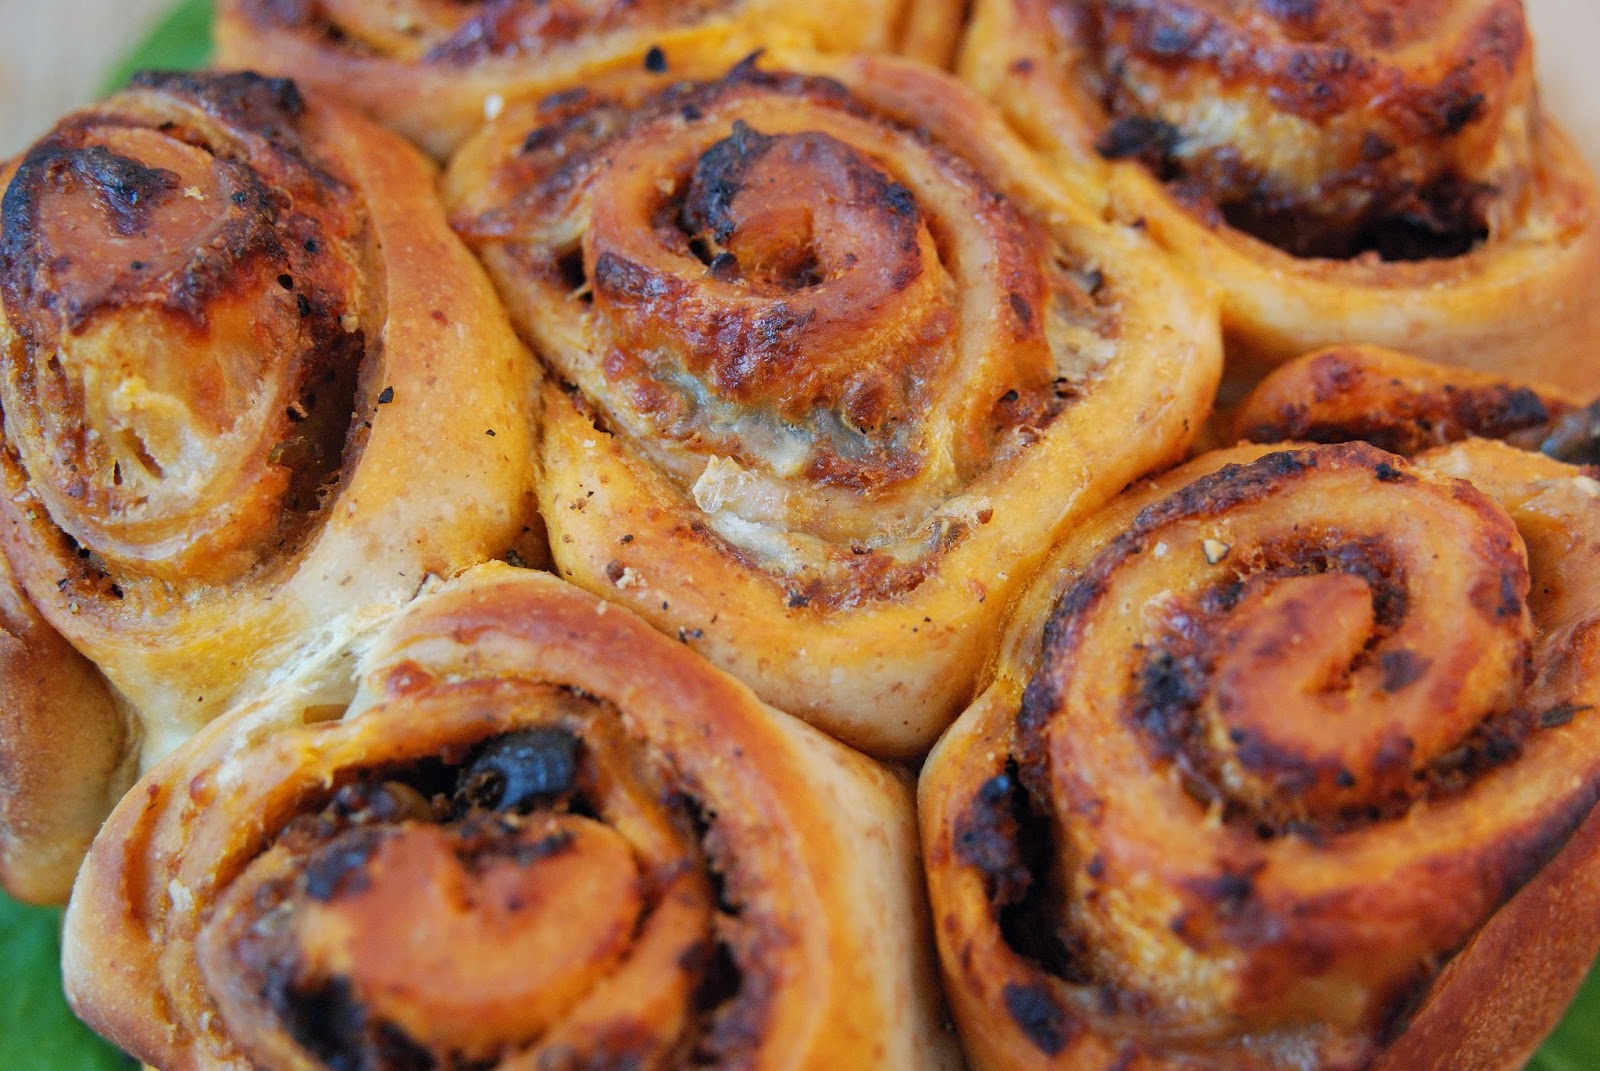
Tomato, olive and mozzarella pizza buns (savoury Chelsea buns)

Ask French expats what they miss the most about France and you'll probably hear in length about camembert, baguette and saucisson (cured sausage). 

I do share their sorrow (I go on a smelly cheese-baguette therapy every time I go back to France), but what makes me miss France even more in my London life is the lack of proper blinds on windows.

After all these years, I still don't understand how British people can sleep without blinds to block the light, even more when you take into account that it's day light at 4.30am these days.
Why, oh why don't your houses have blinds?

"Light makes you strong" tells me The Man.
Yeah yeah, call me a tree fern.

Until I can buy a place of my own and build proper blinds to my windows, I'll go back to bed with my mask on. Good night!


Tomato, olive and mozzarella pizza buns

Like most breads, these buns take a bit of time to make (because of the two rising stages), but there are very easy to make, and are well worth the time.
Adapted from their famous sweet equivalent, the Chelsea Buns (which recipe you'll find on my blog here), they are as delicious as they look impressive (and you can change the filling with pretty much whatever you like), and will make the perfect accompaniment to a very simple soup for dessert, or an impressive addition to a picnic or a dinner party.

Ingredients 

500g/1lb 2oz strong white flour, plus extra for dusting 
50g/2oz caster sugar 
10g/¼oz salt 
40g/1½oz unsalted butter cut into small pieces, plus extra for greasing the tin 
2 free-range eggs 
2 x 7g sachets fast-acting dried yeast 
150ml/5fl oz lukewarm milk 
90ml/6 tbsp lukewarm water
3/4 of a pot olive and sundried tomato pesto (or any other pesto) 
1 ball of mozzarella, very finely sliced
a handful of lovely black olives in water, sliced
some parmesan, grated (optional)


Method to make the pizza buns: 

1/ Place the flour, caster sugar and salt into a large mixing bowl and stir to combine. Add the butter, eggs, yeast, milk and warm water.

2/ Mix the ingredients with your hands until a rough dough is formed. 

3/ Tip the dough onto a well-floured surface and knead well for ten minutes, or until the dough is smooth and elastic. 

4/ Place the dough into a clean, oiled bowl, cover with a damp tea towel and leave to rise for one hour in a warm place (or in front of an heating over)

5/ Tip the dough out onto a very lightly floured surface. Roll out the dough into a rectangle about 50x28cm. Turn the dough so that the longer edge is closest to you and “tack” the dough to the work surface by pressing it down firmly with your finger.

6/ Spread the pesto onto the surface of the dough with the back of a spoon. Spread the mozzarella slices and olive slices on top of the pesto (it doesn't matter if the whole surface is not covered). Grate a little parmesan on top, if desired. 

7/ Roll the long side of the dough towards you quite tightly, forming a spiral inside. When rolled up, release the tacked edge and place it onto a floured part of the surface. With a sharp knife cut the sausage shape into 5cm rounds.

8/ Place all spiral rounds, swirly side up, into a large, deep roasting tin or baking tray (I used a round cake tin with removable botton) greased thoroughly with butter, leaving a 1cm space between each one. You want them to be close enough so that they will bake with their sides touching.

9/ Cover with a damp tea towel and set aside in a warm place to rise for an hour. They should have expanded and be touching each other.

10/ Preheat the oven to 200C/400F/Gas 6. When the buns are ready, put them in the oven and bake for 15-20 minutes. 

11/ After removing the buns from the oven, let them cool slightly before removing them from the tin and placing on a cooling rack, before pulling them apart.


Recipe inspired by Paul Hollywood's savoury chelsea buns
The olives I used in the recipe are Spanish olives kindly offered by Olive it!